


How to publish a website under ip6.arpa
Contents
- What we're really doing
- What you need
- How to read an ip6.arpa name
- Step 1: create the IPv6 tunnel
- Step 2: find the routed prefix
- Step 3: create the zone on deSEC
- Step 4: delegate the reverse DNS
- Step 5: publish the site on Surge
- Step 6: create the CNAME on deSEC
- Step 7: check the DNS and open the site
- The HTTPS wall
- Common problems
- Is it worth it?
- Sources
The idea is a strange little trick: take the reverse DNS zone of an IPv6 prefix and use it as the public address of a website. It works, it teaches you a lot about DNS and it costs nothing. It also won't replace a normal domain, and the sections below explain why.
This builds on Ethan Hawksley's write-up, "How to get a free .arpa domain" (linked in the sources at the end). I changed a few things along the way, mainly the tunnel endpoint: his version used the IPv4 address of a public website to get through the tunnel signup, and here you use an address that's actually yours. Every DNS detail below was checked again in October 2026, and one of them, the Surge target, has changed since he wrote it.
What we're really doing #
The final address looks like a domain inside .arpa, but you don't register it anywhere. Hurricane Electric assigns you an IPv6 prefix through its free Tunnel Broker and delegates the matching reverse zone to the nameservers you choose. As long as that assignment exists, you can manage DNS records below it and create a host like site.<your-zone>.ip6.arpa.
IANA reserves .arpa for internet infrastructure. The ip6.arpa subtree exists to turn IPv6 addresses back into names (reverse DNS), and RFC 3596 leaves room for other record types in that tree. That technical margin is what makes the experiment possible.
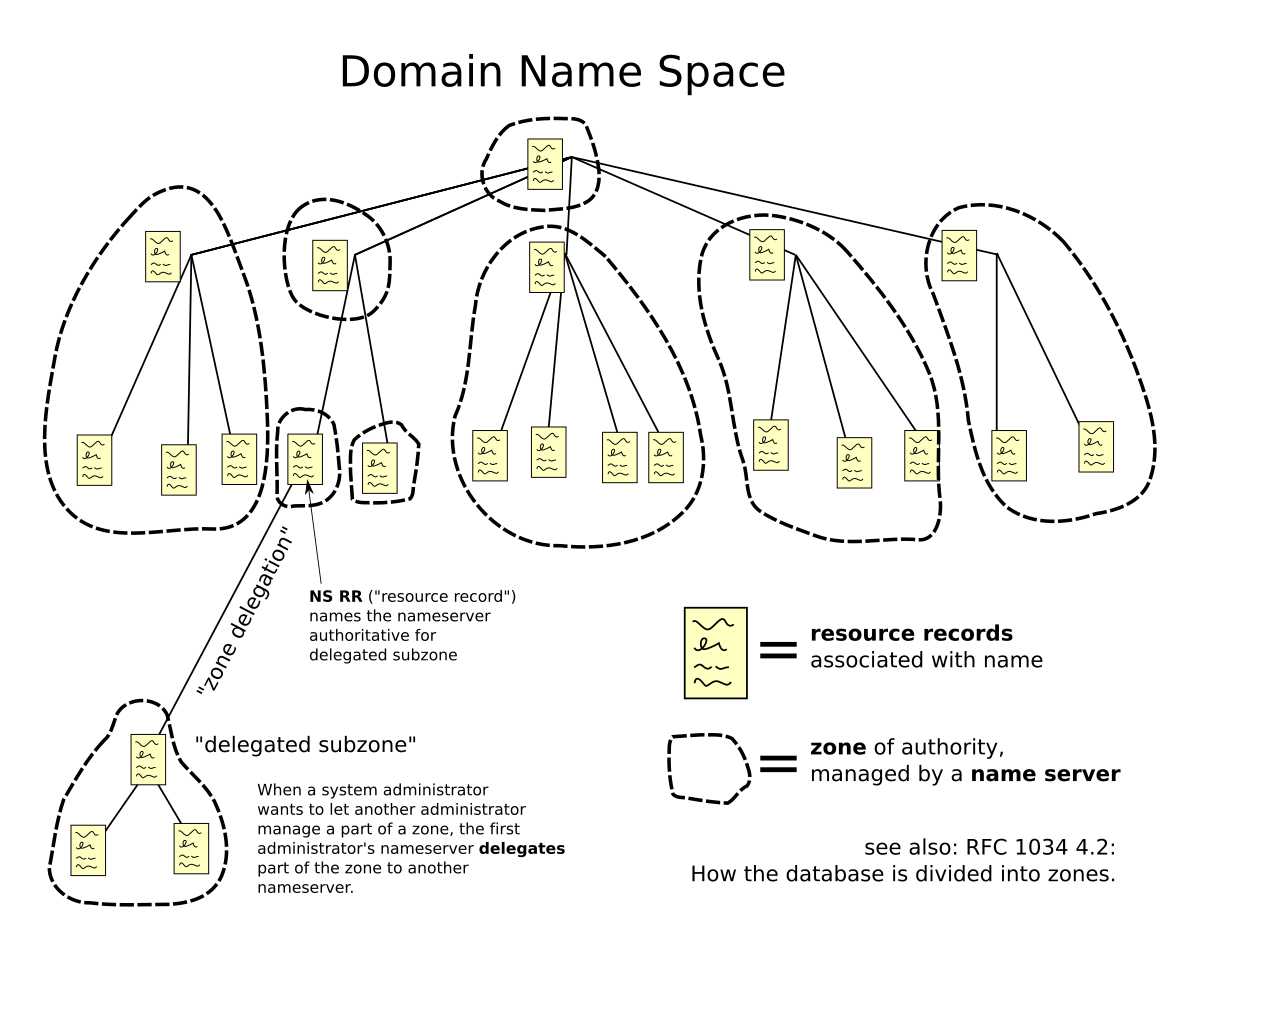
In short, this is a DNS lab. The name isn't short, it isn't permanent and it isn't meant for production. It depends on the tunnel, on the reverse delegation, on deSEC and on the hosting service, all at the same time.
What you need #
- A public IPv4 address that you control, answering ping (ICMP) so the Tunnel Broker can validate it.
- A network where you're allowed to set up and use a Hurricane Electric IPv6 tunnel.
- Free accounts on the Hurricane Electric Tunnel Broker, deSEC and Surge.
- Node.js or Bun, plus a terminal.
- A tiny static site. A single index.html is enough.
Use real details when you sign up, and an IPv4 address that belongs to you or that you're allowed to operate. The Tunnel Broker terms ask for accurate contact information and say you won't falsify anything you give them. Beyond the contract, an endpoint that belongs to someone else can vanish or change without warning, and your tunnel goes with it.
How to read an ip6.arpa name #
Each block of an IPv6 address between colons is a group of four hex digits. To build the reverse name, you pad every group to four digits with leading zeros, split each hex digit off on its own (each one is called a nibble), reverse the whole sequence and add ip6.arpa at the end.
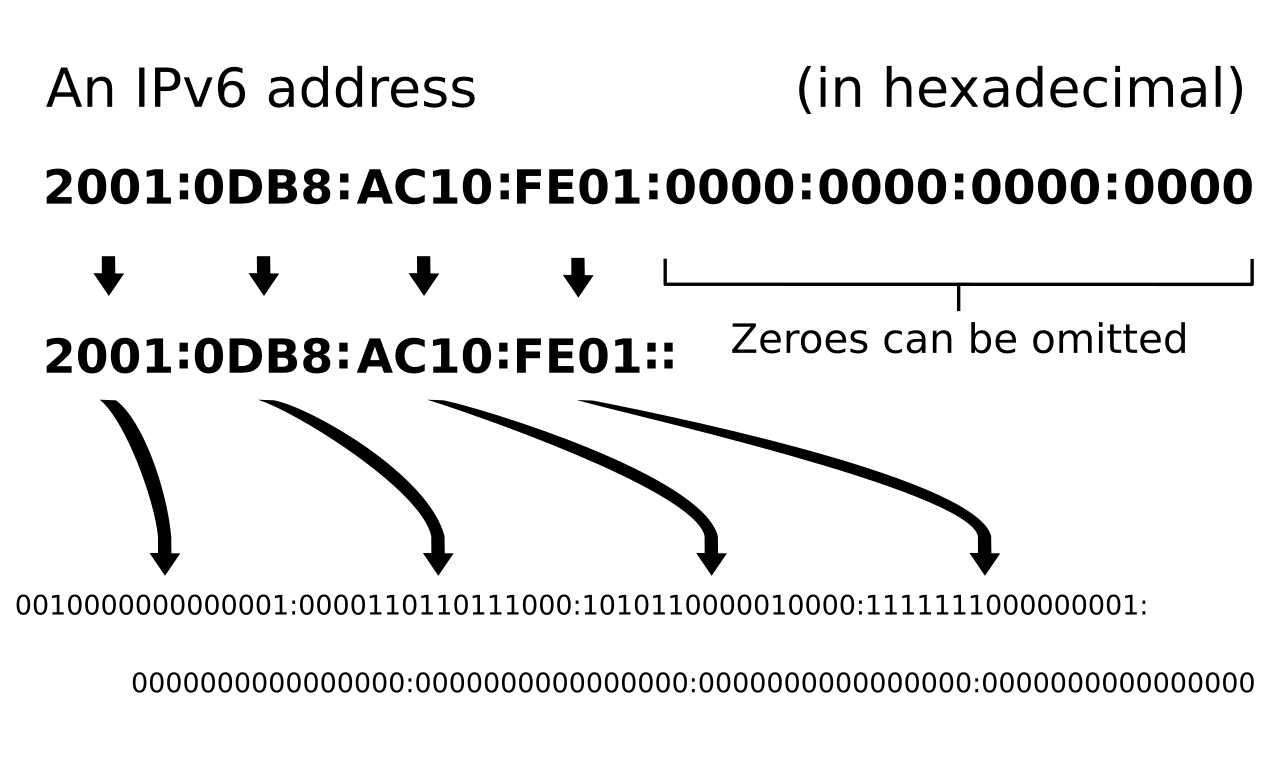
With the example prefix from the original article, 2001:470:1f09:140::/64, it goes like this:
Step |
Result |
|---|---|
Prefix you received |
2001:470:1f09:140::/64 |
Pad with zeros (first 64 bits) |
2001:0470:1f09:0140 |
Split the nibbles |
2.0.0.1.0.4.7.0.1.f.0.9.0.1.4.0 |
Reverse and append |
0.4.1.0.9.0.f.1.0.7.4.0.1.0.0.2.ip6.arpa |
That example zone is still delegated to deSEC today, so you can query it yourself and compare with yours.
Step 1: create the IPv6 tunnel #
Go to tunnelbroker.net, create an account with real details and confirm your email. In the dashboard, pick Create Regular Tunnel from the menu on the left.
In the IPv4 Endpoint field, put the public address of your own connection or server. It has to answer ping at the moment you submit the form. Pick a tunnel server close to you. If you're going to use the tunnel for real traffic, distance and routing affect latency and stability.
Step 2: find the routed prefix #
Once the tunnel exists, open its details and look for Routed IPv6 Prefixes. What you want for this guide is the Routed /64. You don't need the server address or the Client IPv6 Address.
Take only the first 64 bits of that prefix and turn them into the reverse name using the table above.
Step 3: create the zone on deSEC #
Create a deSEC account and, during signup or later in the dashboard, choose the option to use your own domain. Enter the ip6.arpa zone you calculated, without any subdomain for the site yet. (The original article notes that Cloudflare didn't accept this kind of domain.)
Write down the nameservers deSEC shows you. They should be ns1.desec.io and ns2.desec.org, but use whatever your account actually shows.
Step 4: delegate the reverse DNS #
Back in the Tunnel Broker, open the rDNS Delegations area of your tunnel and enter the deSEC nameservers. This delegation is what makes queries for your piece of ip6.arpa land on the zone you just created.
The delegation can take a while to show up. Before publishing anything, check that the authoritative servers answer. On Linux or macOS:
dig +short NS 0.4.1.0.9.0.f.1.0.7.4.0.1.0.0.2.ip6.arpaOn Windows, in PowerShell:
Resolve-DnsName -Type NS 0.4.1.0.9.0.f.1.0.7.4.0.1.0.0.2.ip6.arpaSwap the example zone for yours. If deSEC doesn't show up in the answer yet, wait for the TTL to expire and try again.
Step 5: publish the site on Surge #
In a new folder, create an index.html. Something tiny is enough for a test:
<!doctype html>
<html lang="en">
<meta charset="utf-8">
<title>My ip6.arpa lab</title>
<h1>It works</h1>
<p>This site lives in an IPv6 reverse zone.</p>
</html>
From inside that folder, publish it under a host below your zone. The example uses site because a CNAME can't sit at the apex of the zone, where the NS and SOA records already live.
npx surge . site.0.4.1.0.9.0.f.1.0.7.4.0.1.0.0.2.ip6.arpabunx surge works with the same arguments. The first time you run it, Surge asks you to create a free account. At the end, note the target the tool prints for your DNS.
Step 6: create the CNAME on deSEC #
In your deSEC zone, create a CNAME record. In Subname, put only site (or whatever name you used in the Surge command). As the target, use the host Surge told you about.
This is the detail that changed: Surge's custom domain docs now say to point a CNAME at geo.surge.world (older guides, including the original one, mention surge.sh addresses). If the terminal gives you a different target, follow what it says.
Step 7: check the DNS and open the site #
Test in layers. First the NS delegation, then the CNAME on the host, then the HTTP answer:
dig +short NS <your-zone>.ip6.arpa
dig +short CNAME site.<your-zone>.ip6.arpa
curl -I http://site.<your-zone>.ip6.arpa
On Windows, Resolve-DnsName -Type NS and Resolve-DnsName -Type CNAME do the same job, and curl.exe -I covers the last line.
If the name doesn't resolve, your resolver may have cached an NXDOMAIN from before the records existed. Wait for the TTL, flush the local DNS cache (ipconfig /flushdns on Windows) and try again. Also check that the delegation uses exactly the deSEC nameservers, that the CNAME is on the right subname and that the domain shows up in your Surge account.
The HTTPS wall #
Treat this address as HTTP only. Since 15 March 2026, the CA/Browser Forum Baseline Requirements say public certificate authorities "SHALL NOT issue Certificates containing Domain Names that end in an IP Reverse Zone Suffix", and that includes ip6.arpa. Surge normally provisions a free certificate for custom domains on its own, but no public CA is allowed to sign one for this name, so don't count on a certificate that browsers trust.
In practice: no passwords, no forms, no personal data and nothing sensitive on this site. A private certificate authority can work in a controlled lab, but then every device has to be told to trust it by hand.
Common problems #
Symptom |
What to check |
|---|---|
The Tunnel Broker rejects the endpoint |
Make sure the IPv4 is public, under your control and answers ICMP. CGNAT usually rules this setup out. |
deSEC won't accept the zone |
Check the nibbles. Every digit needs its own dot, and the order must be reversed. |
NS still points somewhere else |
Wait for the delegation and confirm both nameservers were saved in the Tunnel Broker. |
The CNAME doesn't resolve |
Create it on a subname like site. A CNAME can't live at the zone apex. |
The browser keeps forcing HTTPS |
Type http:// explicitly. Some browsers or local policies force HTTPS and will block the page. |
The site disappears later |
Check that the tunnel and the prefix are still active and that your deSEC and Surge accounts are still valid. |
Is it worth it? #
I'd use an address like this to learn and to show how IPv6, reverse DNS and delegation fit together. For a project that needs to stay online, I'd pick a regular registrable domain with public HTTPS. The value here is the path: start from an IPv6 prefix, manage your own reverse zone and end up with a site you can open in a browser.
The URL is long, the chain depends on several services, and the assignment can end along with the tunnel (Hurricane Electric's terms say assigned addresses can only be used while you're a customer, with the service they came with).
Sources #
- Ethan Hawksley, How to get a free .arpa domain (the write-up this guide builds on)
- IANA, the .arpa domain
- RFC 3596, DNS extensions for IPv6, section 2.5 (IP6.ARPA)
- Hurricane Electric Tunnel Broker
- Tunnel Broker terms of service
- deSEC docs: managing records
- Surge docs: custom domains
- CA/Browser Forum, Ballot SC-086v3: sunset the inclusion of IP reverse address domain names
- CA/Browser Forum Baseline Requirements, section 4.2.2
- Domain name space diagram on Wikimedia Commons
- IPv6 address diagram on Wikimedia Commons

